|
[an error occurred while processing this directive]
|
|
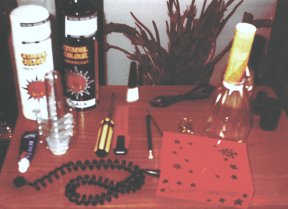
- Black spray paint.
- Glue.
- Pins.
- Craft knife.
- Old belt & belt buckle.
- Vitamin tube / Camera film tube.
- Bicycle handlebar grip.
- Old telephone cable.
- Wooden broom handle.
- Small cardboard box.
- Small plastic drink bottle (small Evian bottled water is ideal)
or small round plastic bottle with ridges.
- Plastic tube. (I used a pop bottle before it's blown up to
proper size - this item is the most difficult to find!)
- Plastic drinks cup.
- Large plastic drink bottle (Robinsons squash bottle is ideal
shape).
- Black masking tape.
- Wide belt to wear with gun.
|
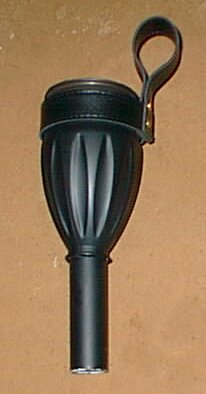
| MAIN
GUN BARREL |
|
|
- Take small plastic bottle and cut in half.
- Insert plastic drink cup into upper part of bottle to strengthen.
- Glue cup to upper section of bottle and spray black.
- Attach ridged lower half of bottle to plastic tube with pins,
glue and tape as necessary..
Click here to see the finished gun
barrel |
|
| FINAL
ASSEMBLY |
|
|
|
- Insert Handle Section A into Main Gun Barrel through opening
at B and glue broom handle to top of plastic cup. Use black
masking tape to secure where necessary.
Click here to see the Final Assembly
Picture
|
|
|
| HOLSTER
SECTION |
|
|
- Cut out top section of large plastic bottle.
- Attach vitamin/film tube to top section of bottle.
- Spray complete item black (fill lower tube with 1p/2p coins
- extra weight may be required to hold Holster down when gun
is inserted, due to weight of wooden handle)
- Use old belt to make a strap - attach to top edge of bottle
and secure with pins, glue and tape as necessary.
- Feed wide belt through strap on holster, feed belt through
rear of power cell section and insert gun into holster.
Click Here to See the finished Holster. |
|
Click Here to see the Finished Model.
Strap belt and holster to waist and ENJOY !
HERE'S SOME WE PREPARED EARLIER.... (Cool! People have actually made
their own!)
Mat Dolphin
|


